
In the series of articles for OpenCV, we come across the basics of some methods and get familiar with the methods of essential operation works.
As we know OpenCV is used for computer vision and image processing tasks. Object detection is a similar operation while analyzing the image or media files like videos. To do so we use some indication methods to get the desired output by using different shapes, and designs or creating an alert in general terms.
In this article, we are going to deal with a cv2.rectangle() which is used for object detection by creating a rectangle over the image with a fixed size and color defined as per its syntax shown below.
Syntax: cv2.rectangle(image, start_point, end_point, color, thickness)
Parameters:
image: It is the image on which the rectangle is to be drawn.
start_point: It is the starting coordinates of the rectangle. The coordinates are represented as tuples of two values i.e. (X coordinate value, Y coordinate value).
end_point: It is the ending coordinates of the rectangle. The coordinates are represented as tuples of two values i.e. (X coordinate value, Y coordinate value).
color: It is the color of the borderline of the rectangle to be drawn. For BGR, we pass a tuple. eg: (255, 0, 0) for blue color.
thickness: It is the thickness of the rectangle border line in px. A thickness of -1 px will fill the rectangle shape with the specified color.
Return Value: It returns an image.
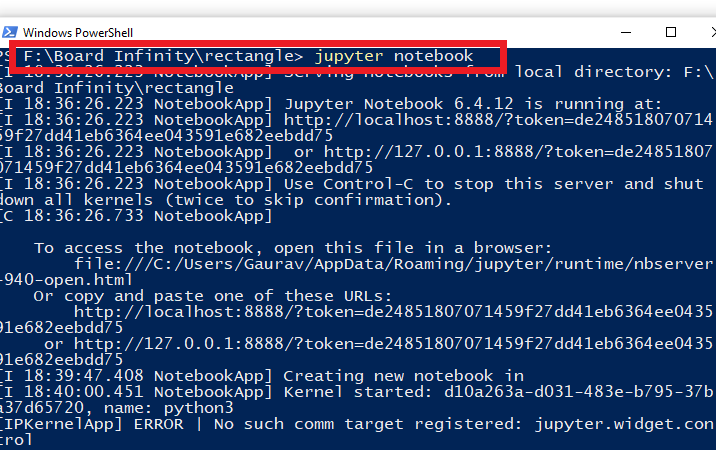
Step 1:- Start your jupyter notebook environment just by typing jupyter notebook, and a new tab in your browser will open with your local file directory as shown below in the second image.
Note:- I would suggest you make a separate directory for each and every program.
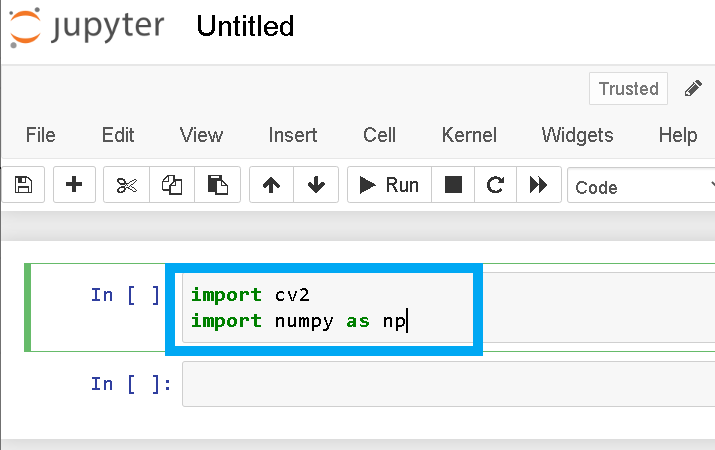
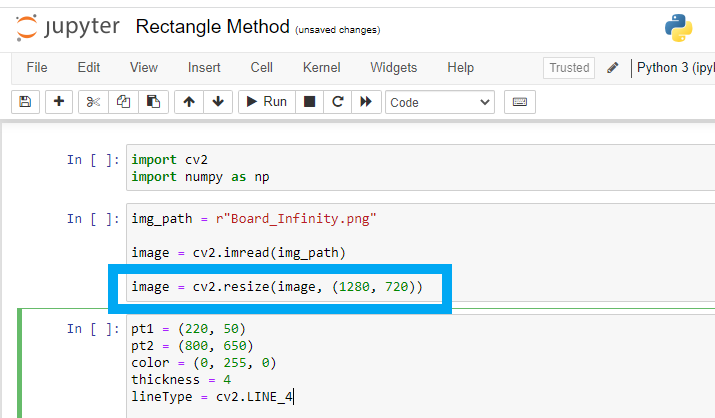
Step 2:- To do the operation of drawing a rectangle on the image we need to import two different dependencies as shown in the image.
Step 3:-Let us understand how the flow of the program will apply to the image using code.
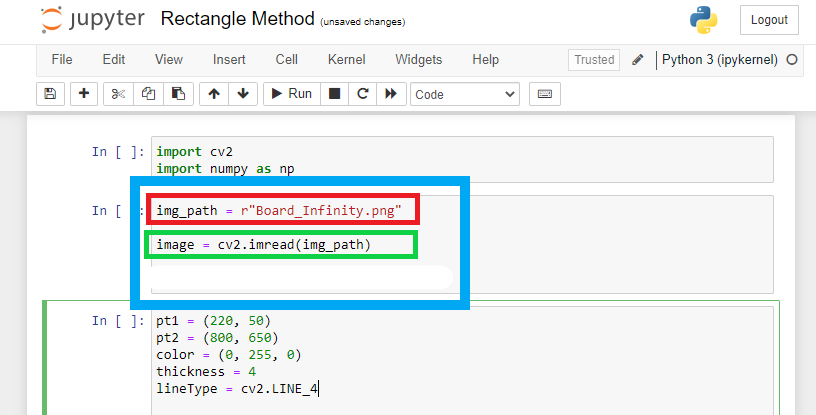
Need to read the image on which we have to do the operation and for that
We’ll read its location using its path and will store it in a variable as shown in the image in red color.
Now in the second stage,e we’ll read that image using imread() marked in green color.
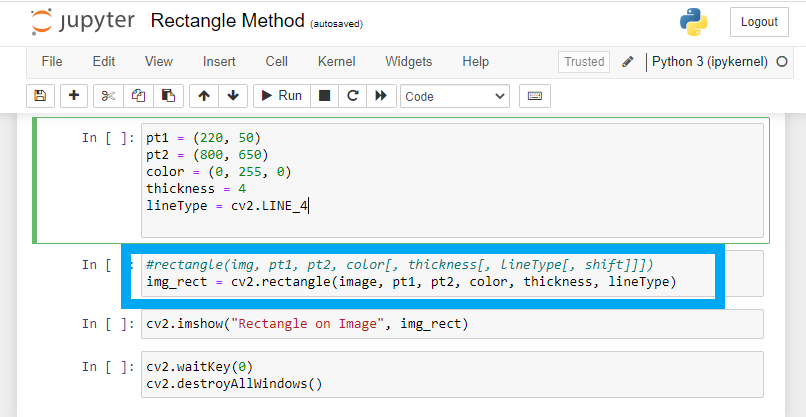
The third stage will apply the methodology of drawing the rectangle using vertex as defined in OpenCV using the rectangle method as shown below in the second image marked in blue color.
Syntax:- rectangle(image, start_point, end_point, color, thickness)
Step 4:-The rectangle method has some parameters used to define the characteristics of the rectangle to be drawn on the image like color thickness, etc, and used before the method applies to the code as shown below.

Step 5:- In this image, we are actually using the rectangle() to draw and will see its outcome on our image selected in step 1
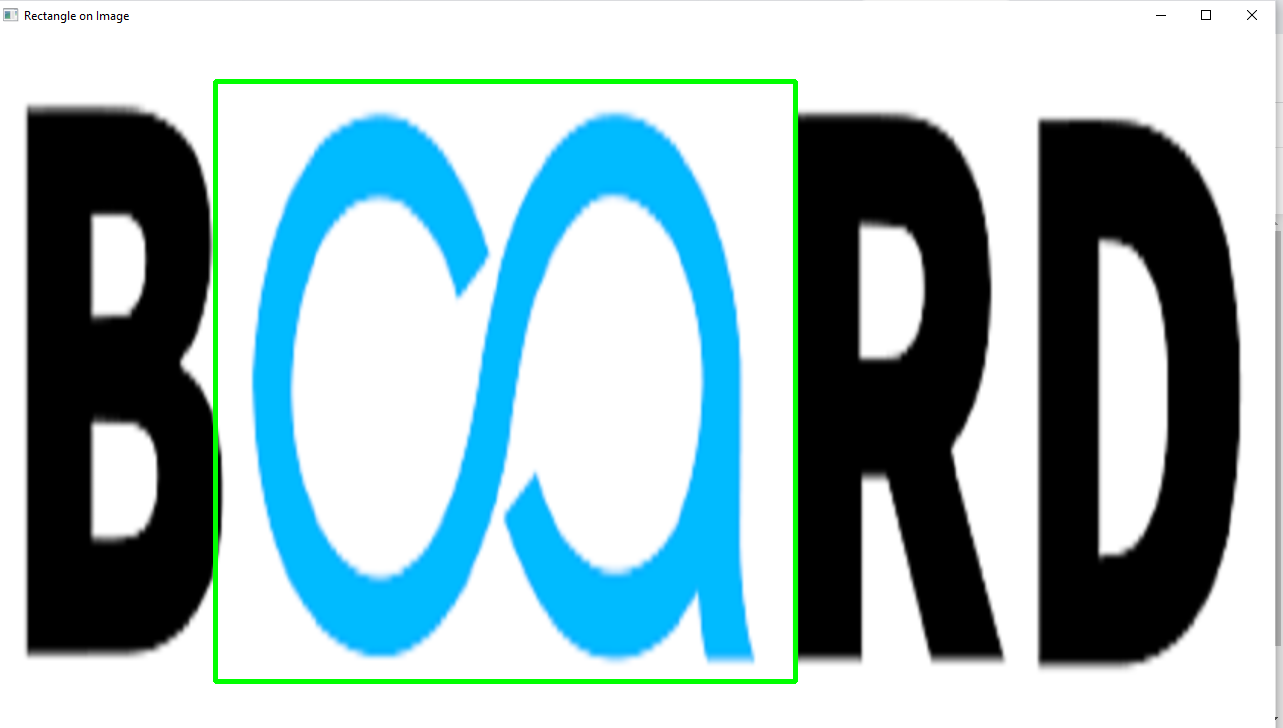
Step 6:- to show the output image we are using imshow(), which is a predefined method used in OpenCV to show an image in a new window.

This is how we can use the rectangle method for the computer vision and image processing operation to mark the object in the output.
There are various methods we can use for image processing. In the above example one of them is used when the image size is big in pixels and we want to execute an operation on desired size (pixel), in that case, we use resize() as shown below.
This is the final code of the above example for this rectangle method, I would suggest you use the code in one or two cells instead of different as we use that shown in images.
We use separate cells to explain every step in this example.

Code:-


1 Comments
very informative
ReplyDelete